
Veracity Learning LRS comes in a few versions. The main version, and the one you're most likely looking at right now, is LRS.io.
This is our cloud hosted SaaS service, where anyone can create an LRS. You can use the free version, which is subject to some restrictions, or you can get more data storage, more transactions per second, and additional support by choosing a paid plan. LRS.io is a special build, and contains a few features that are not available in any other version. Additionally, LRS.io is managed by our team. We know the software inside and out, so we can make database upgrades, system updates, and generally keep everything running smoothly without you needing to do anything.
Accounts on LRS.io have a service tier. Each tier give you a specific amount of storage per LRS, a certain amount of LRSs, and a budget of transactions per second. You can upgrade your tier at any time by contacting us.
Many of your are on the free tier. This tier give you up to
For a full list of the current rates and limits for the service tiers, click here. We can also generate a custom tier for you.
Most accounts are on our "Shared Infrastructure". This means that the webserver to access, the database cluster in which your LRS's database is hosted, the load balancer and rate limiter; all these are shared among our clients. The rates and limits of each tier exist primarily to ensure fair allocation of these resources.
Veracity can also host your account on dedicated infrastructure. This means that you don't use the same databases or webservers as other clients. You're entitled to the full throughput of the machines allocated to your account. These tiers don't have any rates or limits, other than those set by the fundamental limits of the hardware. This is the best solution for enterprise clients.
Veracity Learning LRS is also available for you to install and host on your own servers. While we've tried to make the process as easy as possible, you will have to set up and run your own databases, and install our server software. Onsite versions come in 2 flavors.
This free, downloadable software can be used in production or just for testing. It's easy to use, easy to setup and install, and high performance. The free version has some limitations - we restrict the ability to use some advanced analytics capabilities, restrict the total number of LRSs, and only let you have a single user account for the administrative interface. This version is suitable for many users, but is missing many of the awesome features that make our LRS one of the best on the market. Additionally, this version cannot use ElasticSearch to accelerate the analytics system. While there is no hard limit on the number of xAPI statements you can store, practical limits to the speed of the analytics will begin to appear on the order of a few hundred thousand xAPI statements.
You can download Veracity Learning LRS Lite by clicking here. Then, click the green "Download Veracity Learning Lite" button.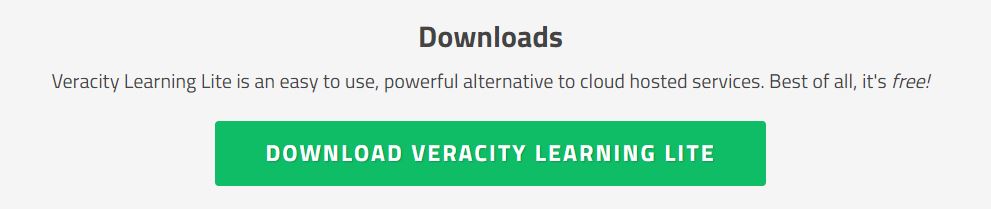
Veracity Learning LRS is also available in an Enterprise version for onsite installation. This option is appropriate for large enterprises with the need to manage huge amounts of data. The Enterprise version is much like LRS.io - it includes all the features of the SaaS solution, but in your own data center. It even has a few capabilities that LRS.io does not, namely, the ability to host plugins that expand the way that the system works. LRS.io shared infrastructure tiers can't do this because of security concerns, but when you control the system, you can add .JS files that expand the abilities of the analytics system, or integrate with other platforms.
Here's list of features that are available in the Enterprise version that are not available in Lite:
The process for installing the Lite on Enterprise version of the LRS is quite similar. First, you'll need to download and extract the software. Veracity Learning LRS is cross-platform. You can run it on Windows, Mac, or Linux. If you need to run the server on some other OS, contact us for a build - we can make a version for most operating systems.
Inside the archive, you'll find executable for each common OS. Select the one you need, and copy it to your server.
Enter the connection string to the MongoDB database. (default: 'mongodb://localhost')
This is the address of the MongoDB server. Do not include a database name in the connection string. You may include replicaSet or authorization options (Enterprise Version). Check the Mongo documentation for a full accounting of the format. For simple test installs, if Mongo is running on the same machine as the server, the default will work. The server tests the string after you enter it - Mongo must be running at this point.
Will you use a Redis server to enforce rate limiting? (type 'yes' or 'no')
This question and the following question (the address of the Redis server) control whether or not some Enterprise features are enabled. These features include rate limiting and Websocket notifications. They are completely optional. Answer ‘no’ for test installs. If you answer yes, the following question will prompt you for the server address. Redis must be running, as the system verifies that it can connect.
What is the external host name (DNS) that users will use to access this system? (default: 'local.veracity.it')
The server must know its own public facing internet address. In production deployments, it is common for the address and port that the software uses to differ from the one displayed to users, because of proxy configuration, load balancers or DNS. For a local install, please accept the default. This default value is a DNS entry controlled by Veracity that resolves to ‘localhost’. Do not enter ‘localhost’ directly, as our subdomain routing features may not work on all OSs.
What port number should the server run on? (default: '80')
This is the local port that the server actually listens on. Port 80 is the default for common web servers, but often is in use by other software. You may choose any port. On some OSs, certain ports require the process to be run with administrative access.
What is the port number that external users will use to access this system…
This is the port that will be displayed to users. If behind a proxy, use the port the proxy listens on. For a local test install, use the same port as the previous question.
Does your webserver use an SSL certificate?
Is the server behind an SSL terminating proxy, or should it server SSL itself? When answering yes, you must either place the server behind an SSL terminating proxy, or configure the sslKey and sslCert paths.
Enter the email address for the super-administrator user. This account must not already exist, as it will be created now.
This question and the following control the super admin login credentials. Note that this information is visible in the .env file.
Would you like to disable subdomains in the URLs for each hosted LRS?
The default behavior of the system is to allocate subdomains to each LRS in the system. This can cause problems with some DNS providers, and is not supported for the hostname ‘localhost’. You may disable this behavior, but it is highly discouraged. For local installs, use local.veracity.it as the public address, which will resolve to your local machine properly. Not all features currently support ‘non-subdomain’ installs.
Enter the name of the database to use for the system client information. User and LRS metadata is stored here, not the actual statements. (default: 'VTCLRS')
The system allocates a new database on the Mongo Server for each LRS in the system. The data needed to manage the systems overall is located in the database provided in this prompt. You can answer any alphanumeric string, but it is rarely necessary to use anything other than the default.
Enter a random string of characters that will be used as an encryption key. (default: 'youAbsolutelyMustChangeThis')
Several parts of the system require a unique random string for encryption functions. Enter a string here. In a multi server install, all servers must include the same string. When backing up and restoring a database, this setting must not have changed from the initial value provided at install. Please don’t accept the default for a production deployment.
Would you like the server to send emails (Enterprise Version)
Answering ‘yes’ to this question will then prompt you for SMTP configuration information. If you answer ‘no’, the server will not allow “self service” accounts, and instead each user must be created and confirmed by the super admin.
All system settings are configured via a file called .env. This file should be in the working directory in which the server executes. This is generally the directory where the executable file is located, but is not always so. The .env file needs to have its permissions set so that the user account used to run the server has access to read and write it. Values in the file can be overridden by environment variables you set in the shell. The file looks something like This
elasticSearchServer=http://localhost:9200
mongoServer=mongodb://localhost:27017
host=local.veracity.it
port=3005                    //The actual port that the server uses
displayPort=3005             //The port that the client sees. Useful for proxy situations
protocol=http                //The actual port the client sees. When using a proxy, use the protocol of the proxy
admin_email=tom@example.com
admin_pass=1234
domainRouting=false          //Whether or not the system will use virtual server subdomains. If you're using this, make sure that *.yourdomain.com routes to the LRS server
adminDBName=VTCLRS
SERVER_SECRET=1234
production=true
closeConnectionsAfter=10 minutes
inProcessJobs=true //Process the job queue in the main app.
sslKey=testcerts/privatekey.key
sslCert=testcerts/certificate.crt
SERVER_NAME=Robs Dev Box //Name for the footer
You can edit these files in a text editor. If you do so, the server will need to be restarted for the values to take effect.
The latest version can terminate your SSL connections without need for a proxy. To activate SSL on the install, set the port and displayPort to 443, set the protocol to https, and give a path to a .key and a .crt file. The server will now host using SSL. You will not need an additional proxy server.
If you're using Linux, you can use SystemD to have the LRS server start automatically.
  [Unit]
  Description=vtclrs
  After=network.target

  [Service]
  WorkingDirectory=/etc/vtclrs
  ExecStart=/etc/vtclrs/lrs2-linux
  Type=simple
  PIDFile=/run/vtclrs.pid
  Environment=""


  [Install]
  WantedBy=default.target
  systemctl daemon-reload;
  systemctl enable vtclrs.service;
  chmod 755 /etc/vtclrs/lrs2-linux
  systemctl start vtclrs.service